
Set Up Your First Android Application Using PhoneGap
The Android operating system has created a lot of stir in the landscape of mobile technology. There is a sense of gratification webmasters feel while developing for this platform and it's justifiably so. Android has become a big buzzword, and it's quite tempting to make an app for it.
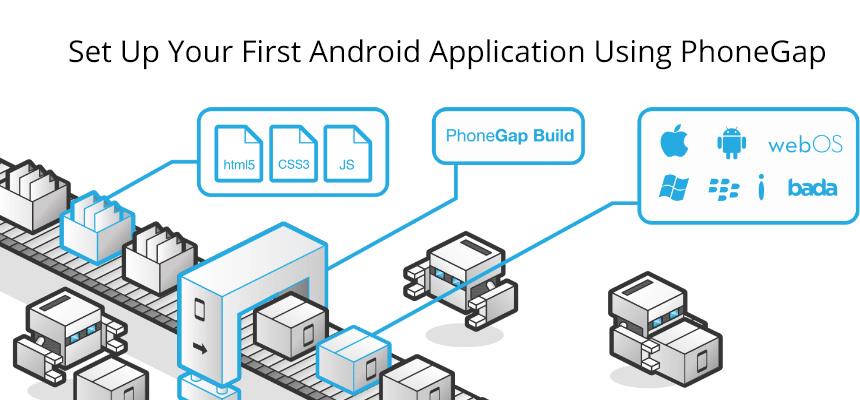
So, if you are one of those considering to build your own Android app, then you've come to the right place. In this tutorial, we will explain you how to create an app with PhoneGap. If building an Android app is your interest, you can follow this tutorial for your purpose.
What is PhoneGap?
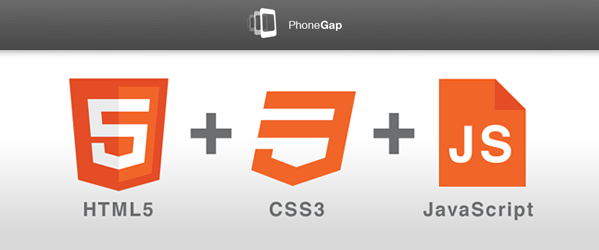
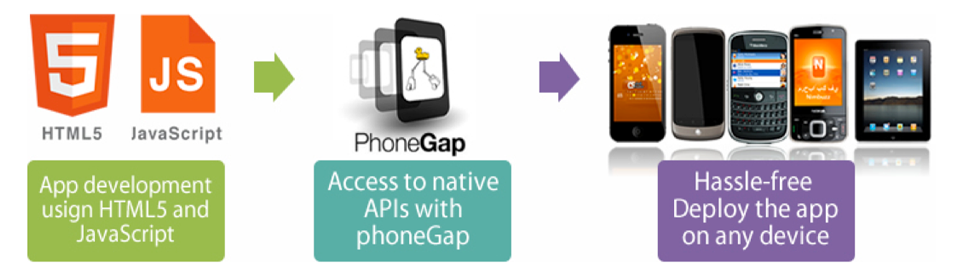
PhoneGap is a popular open-source platform that allows developers to build cross-platform mobile applications using HTML, CSS, and JavaScript. It comes with a JavaScript API to build functionalities within your application such as GPS, on-board camera etc., and also interact with them. It's a perfect source for any Android app development company when it comes to developing a bespoke app that is compatible with an array of platforms.
Prerequisites of Developing an Android app with PhoneGap
- You'll need to install Java Development Kit (JDK)
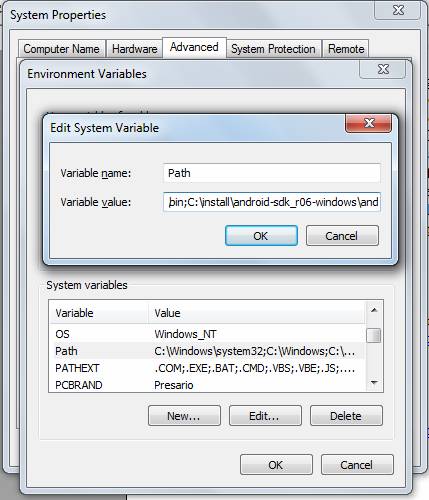
- Next, install Android Software Development Kit (SDK) . While installing the software, make sure you also set
android-sdk-<os>/toolsfor your user and select the PATH variable.
Next, install Eclipse by entering sudo yum install eclipse in the terminal. For those who have Ubuntu installed, run sudo apt-get install eclipse. You can also download Eclipse from its official website.
After this, start installing ADT plugin for Eclipse. Android Development Tool (ADT) is a plugin which creates an environment for developing an Android application. It is also a nice resource to debug an Android application.
You can install ADT by clicking on “install new software” from the Eclipse's window. Now, click on the Add button to add a repository. Here, you'll need to provide a name for your repository as per your choice, and also location by entering https://dl-ssl.google.com/android/eclipse/.
After this, you'll be provided with a checklist containing Developer Tool Items select Next to view the list and items that need to be downloaded. After this, you'll need to accept the License Agreement to finish the process.
Once you are done with installing the ADT plugin for Eclipse, navigate to Window –> Preferences –> Android and set the SDK path of the extracted SDK. After this, go to Window –> Android SDK and AVD Manager. Pick up the most suitable package category, and check all the available items for a complete installation. Click Install to complete the process. The downloading process will consume some time, so be patient and wait for completing the same.
Getting Started with The Mobile App Development
As of now we have created an environment for our application development, next it's time to create an HTML file and then start building our app using PhoneGap. For this, open any code editor and start entering the following HTML code into it. After this, save the file as index.html.
<manifest xmlns:android="http://schemas.android.com/apk/res/android"

package="com.phonegap.helloworld"

android.versionCode="1"

android.versionName="1.0">
Developing a project in Eclipse requires you to create an Android Virtual Device (AVD) , which provides you with the necessary support to test your app and then installing it on your phone. For this, go to Window (in the Eclipse), and then Android SDK and AVD Manager. Here, choose Virtual Devices, and then New. Here, you'll see a dialogue box wherein you need to provide some crucial details regarding your app including the name, platform, and so on. To finish this step, click on the Create AVD button.
Next, for creating a new Eclipse project, go to File–> New–> Project. Select Android Project for Project Type and start providing the below mentioned details.
- Name of the Project: Hello World
- Application name: Give a relevant name to your app
- Package name: the name you want to give to your app
- Create Activity: keep it as App for all the apps built using PhoneGap
- Build Target- Any Android version you wish to target
Now, click on Finish to allow Eclipse prepare the necessary structure and files.
Integrating PhoneGap
For this, you need to download and install the PhoneGap binary from your website and extract the same. Within the Eclipse, create two folders in the root project with names- /assets/www and libs. Now, insert the HTML file we created above into /assets/www folder. In the HTML code, substitute the name of the PhoneGap JS with the file you wish to use. Now, copy the JavaScript file to the Eclipse's project /assets/www which you need to take from the extracted PhoneGap archive containing inside the Android folder. Paste the JAR file to /lbs. After this, right-click on the libs folder in Eclipse, and select Configure Build Path. Add the PhoneGap JAR file from the project. Refresh the project and you're done.
After this, we have two have files which need some modifications. They are AndroidManifest.xml and App.java. Click right on AndroidManifest.xml and Open With–> Text Editor. Start searching for the following piece of code in the file.
<manifest xmlns:android="http://schemas.android.com/apk/res/android"

package="com.phonegap.helloworld"

android.versionCode="1"

android.versionName="1.0">
Once you are done locating the snippet, add the following lines of code below the same.
<supports-screens


    android:largeScreens="true"


    android:normalScreens="true"


    android:smallScreens="true"


    android:resizeable="true"


    android:anyDensity="true"


/>


<uses-permission android:name="android.permission.CAMERA" />


<uses-permission android:name="android.permission.VIBRATE" />


<uses-permission android:name="android.permission.ACCESS_COARSE_LOCATION" />


<uses-permission android:name="android.permission.ACCESS_FINE_LOCATION" />


<uses-permission android:name="android.permission.ACCESS_LOCATION_EXTRA_COMMANDS" />


<uses-permission android:name="android.permission.READ_PHONE_STATE" />


<uses-permission android:name="android.permission.INTERNET" />


<uses-permission android:name="android.permission.RECEIVE_SMS" />


<uses-permission android:name="android.permission.RECORD_AUDIO" />


<uses-permission android:name="android.permission.MODIFY_AUDIO_SETTINGS" />


<uses-permission android:name="android.permission.READ_CONTACTS" />


<uses-permission android:name="android.permission.WRITE_CONTACTS" />


<uses-permission android:name="android.permission.WRITE_EXTERNAL_STORAGE" />


<uses-permission android:name="android.permission.ACCESS_NETWORK_STATE" />
Ok, we are almost done now. Just a few steps before running the app. Locate the src.folder and open the Activity tag in the xml file. Add android:configChanges="orientation|keyboardHidden,the result will be something like this:
<activity android:name=".helloworld" android:label="@string/app_name" android:configChanges="orientation|keyboardHidden" >
Now, in Eclipse, access the src/com.phonegap.helloworld/App.java file, and then start importing the file by adding the following code./p>
import com.phonegap.*;
After this, modify the class App to extend DroidGap. The output will be like this:
public class App extends DroidGap {
Finally, open your index.html file and replace the setContentView() method with the following onCreate() method.
super.loadUrl("file:///android_asset/www/index.html");
And that's all!
With this you finish the process of creating you Android app. Now, you can run your app in the emulator with the help of AVD, which you have created earlier.
Posted by Juana Steves

Juana Steves is a technical writer associated with Xicom Ltd. – a trusted software development company. You can also get in touch with her to opt Android Developer for Hire, in case you are looking forward for the same.
Related Posts

Lost your iPhone? Well, it can be a pretty scary experience, but we promise you that not all hope is lost.

Creating a successful mobile app is a journey, not a sprint. From initial concept to launch, designing a modern and effective app is a multi-layered process that typically demands a significant investment of time, often spanning several months or even a year for complex projects.


If you own a business, you know how important it is to remain at the forefront of your customer’s awareness. If you aren’t visible to your customers, you can’t succeed at retaining their business. Likewise, if it is too difficult to work with your company, many customers will go elsewhere.

Mobile apps can be an effective way to help your business thrive this year amidst the growing competition. It can reach your customers fast and create meaningful connections.


Comments
comments powered by Disqus