
How to Manage Multiple Environments in a React Native App for Android
If you are a developer, then your life could get easier if you know how to manage multiple environment in React Native app; and what’s most amazing about this is that it does not change the way your app sells, looks or feels.
But, it undoubtedly saves a great deal of time and hustles that a developer encounters. This post is a complete guide for React Native Developers to make them learn and understand ‘How to manage multiple environments in a React Native App for Android’. If the React Native app environment variables are specifically defined, they give us a way to;
- Change variable values at the build time.
- Change the bundle/app IDs to facilitate installation of any variant of the environment on same device simultaneously.
- Change the icon for any variant build.
- Change app’s display name or title.
- Change the launch screen of the app.
Here, we are going to present a scenario in front of you, as it will become easier to understand with the help of example.
Scenario
Suppose, we have two applications. One of the them is used by the Sales Team and the other is by Marketing Team. You noticed that about 90% of the application features, interface and user experience is same; hence, you suggested that instead of using two different mobile applications with minor differences, why shouldn’t we use the React Native development approach to save our development time and efforts, while making the maintenance and modification of the code easier in future.
Step-By-Step Guide to Manage Multiple Environments in a React Native App for Android
Step # 01 – Use React Native CLI for React Application
First of all, go to ‘My Apps’ and select React-Native.

Now run your android application by selecting the ‘Run Android’ option under React Native.

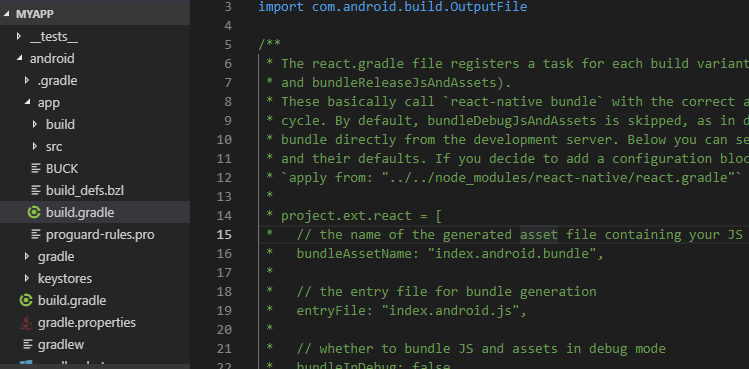
Once your installation is successful, your directory structure will look somehow like this.
Step # 02 – Setup Multiple Environment Using Product Flavors in Android
Now we will select our desired multiple environment for android (apps) by using product flavors.
Go to android/app/build.gradle and add dot env gradle path on the 2nd line, as shown below.

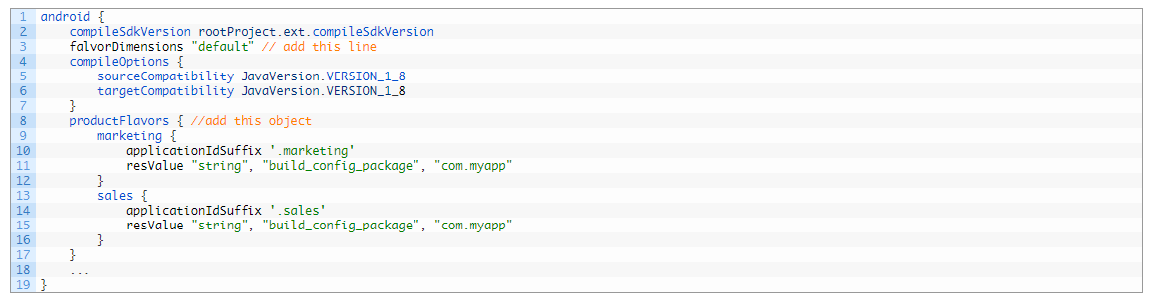
Now add env configuration for your required environments i.e. Sales & Marketing in our scenario. Also, don’t forget to use “default” as the flavor dimensions.


At the android end, the most important thing is to create the product flavors. For this, go to android/app/build.gradle and add the following line. Here, in the image below, you can see we have created two flavors for Sales and Marketing environment.
Now create icons and launch screens for both product flavors. While doing so, remember that the ‘res’ folder is placed inside the src/main folder by default as shown in the picture below. However, if you want to have different splash screens and icons for the flavors (Marketing & Sales), then create individual folder of each flavor in src. Also, don’t forget to keep the folder name similar to the product flavor’s name as you defined earlier in the build.gradle.

Now, you will have three different folders i.e. One ‘Main’ and two for the ‘Product Flavors’ i.e. Sales and Marketing. Your defined flavors now have splash screens, icons and application values; and in case if something does not exist within the flavor directory, then the resources of the main directory will be used. Here, we have now removed app/src/main/res and a ‘res’ folder is created inside the sales and marketing folder.

Step # 03
Use React-Native config package for using the environment variable.

Or

Then,

Once the installation of the package is completed, create two env files are your project’s root. One off course for ‘Sales’ i.e. .env.sales; and other for Marketing i.e. .env.marketing.
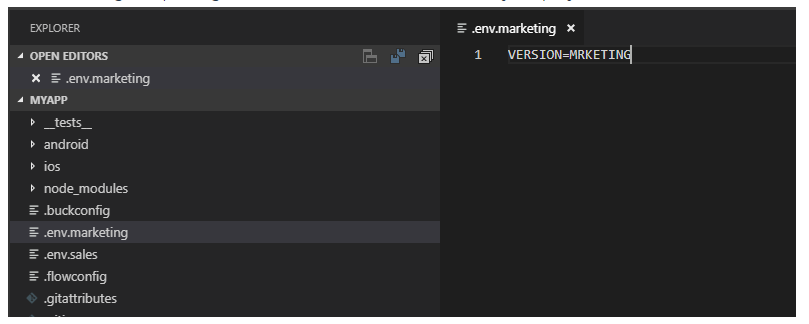
Now, by using config module, you can easily access environment.

Step # 04 – Create your Application
To Run on Android: Add these in package.json inside the ‘scripts’ tag in order to run your application on the simulator.

To create an Unsigned Build: To create APK or unsigned build, add the following scripts inside your package.json.

For Marketing Environment:

For Sales Environment:

Posted by Sam Khan
Related Posts

Lost your iPhone? Well, it can be a pretty scary experience, but we promise you that not all hope is lost.

Creating a successful mobile app is a journey, not a sprint. From initial concept to launch, designing a modern and effective app is a multi-layered process that typically demands a significant investment of time, often spanning several months or even a year for complex projects.


If you own a business, you know how important it is to remain at the forefront of your customer’s awareness. If you aren’t visible to your customers, you can’t succeed at retaining their business. Likewise, if it is too difficult to work with your company, many customers will go elsewhere.

Mobile apps can be an effective way to help your business thrive this year amidst the growing competition. It can reach your customers fast and create meaningful connections.


Comments
comments powered by Disqus