
Installing Wordpress on Microsoft IIS by Using the Microsoft Web Platform Installer 4.5

WordPress.org offers free software that you can install on a web server. You can upload and install themes and plugins, run ads, and edit the database.
This article describes how to install and configure WordPress 3.x on Windows Server 2008 R2 or Windows 8 by using the Microsoft Web Platform Installer (Web PI) version 4.5, the latest version in time of writing of this article is WordPress is 3.5.1.
The Web PI is a free tool that makes getting the latest components of the Microsoft Web Platform—including Internet Information Services (IIS), MySQL, the Microsoft .NET Framework, and Visual Web Developer—quick and easy. The Web PI also lets you install web applications such as WordPress with the built-in Windows Web App Gallery.
Prerequisites
The supported operating systems for the Web PI 4.5 are Windows 8, Windows 7, Windows Vista Service Pack 1 (SP1), Windows Vista, Windows XP Service Pack 2 (SP2) and later versions, Windows Server 2008 R2, Windows Server 2008, and Windows Server 2003 Service Pack 1 (SP1) and later versions.
For this guide, it is assumed that you have Windows Server 2008 R2 installed on your computer. You will also need an Internet connection and administrator privileges for your computer.
To install WordPress on IIS 7.0 by using the Web PI 4.5, follow these steps:
Step 1. Install the Microsoft Web Platform Installer 4.5
In this step, download and install the latest version of the Web PI which is in time of writing this article 4.5.
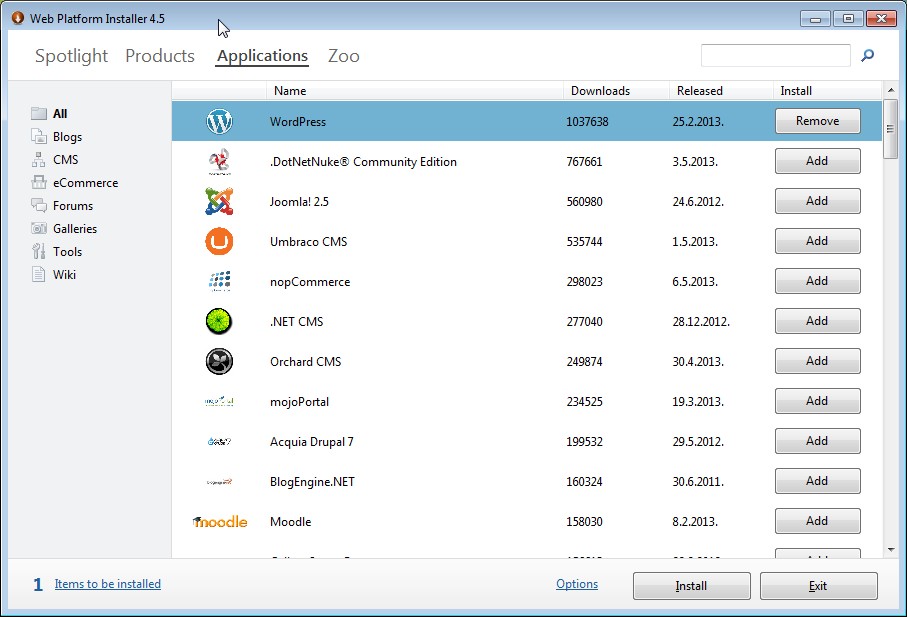
Step 2. Select the products and applications to install
In this step, you select the version of WordPress that you want to install. WordPress 4.5.1 is used in this guide.
Next to WordPress, click Add.
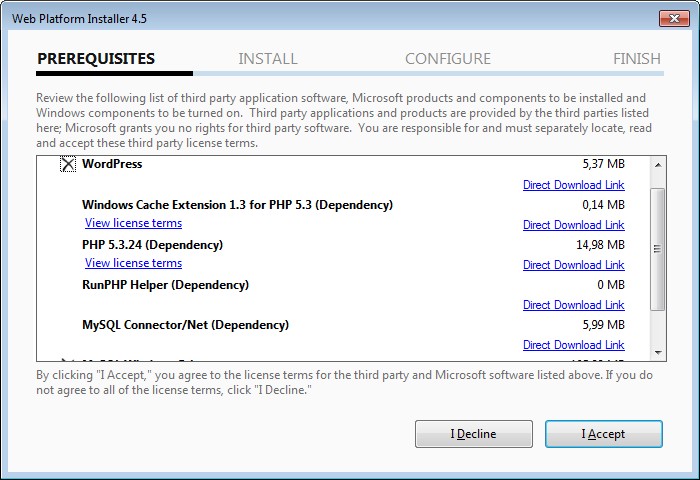
Step 3. Review and configure the selected products and applications
In this step, you review and configure what you have added. Additionally, you add the database, name the MySQL database, and name the WordPress 3.x site.
When you are asked which type of database you would like to use, leave MySQL selected. Specify a password for the MySQL administrator user name (root), and then click Continue.
Review the files to be downloaded and installed, as well as the license agreements, and then click I Accept.
Allow the Web PI installation to complete. In the Web Site box, leave Default Web Site selected. In the 'WordPress' application name box, type a name for the WordPress 3.x site, and then click Continue. For example, type my WordPress.
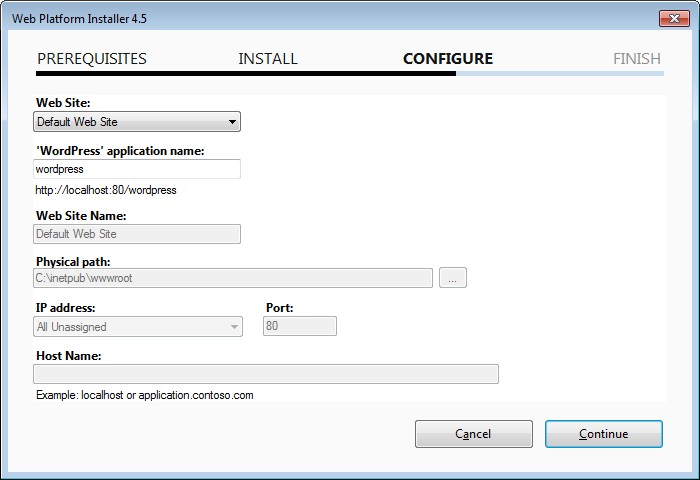
Allow the Web PI installation to complete. In the Web Site box, leave Default Web Site selected. In the 'WordPress' application name box, type a name for the WordPress 3.x site, and then click Continue. For example, type my WordPress.
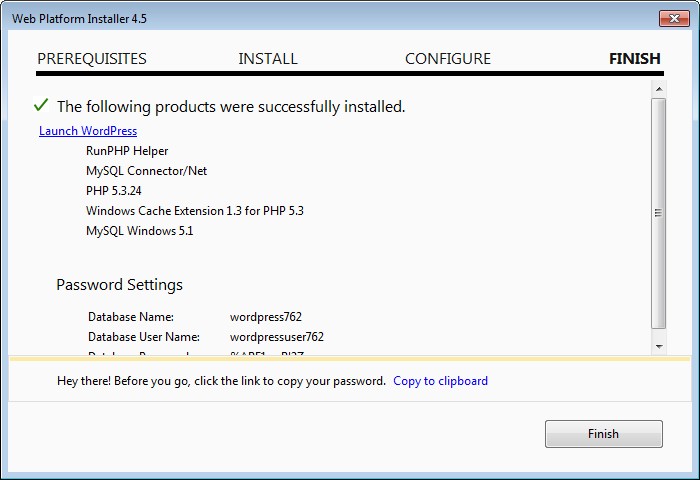
Click Finish and Click Exit to close the Web PI 3.0..
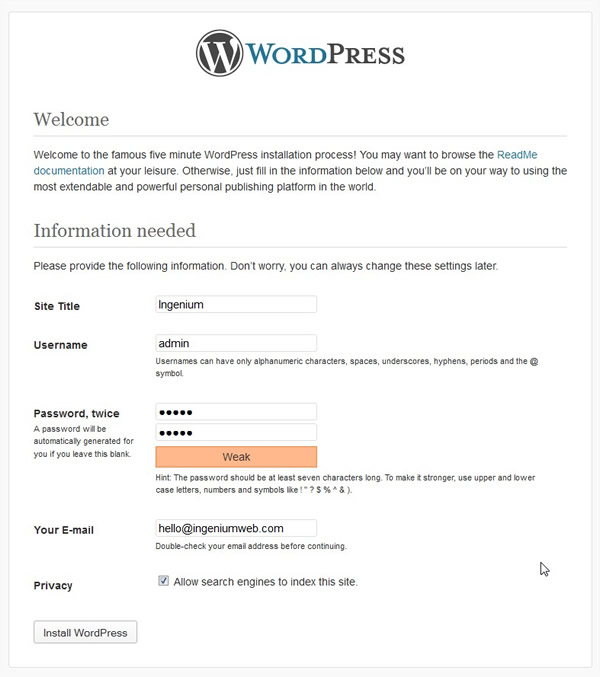
Step 4. Complete the installation and configuration
In this step, you complete the installation.
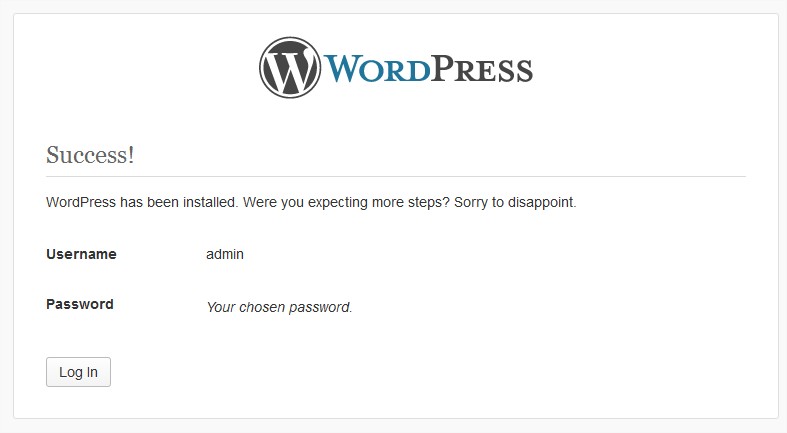
Switch to Internet Explorer. Go to your WordPress website. For example, go to http://localhost/wordpress/wp-admin/install.php.
In the Site Title box, type the name of your site. In the Password, twice boxes, type a password for the admin account.
Type admin, type the password, and then click Log In.
Additional Information
WordPress is free, open-source content management system (CMS) software that lets individuals or communities of users easily publish, manage, and organize a wide variety of content on a website.
IIS URL Rewrite 2.0 lets you create powerful rules to implement URLs that are easier for users to remember and easier for search engines to find. For more information, visit these websites:
Windows Cache Extension for PHP is a PHP accelerator that is used to increase the speed of PHP applications that are running on Windows and on Windows Server. After Windows Cache Extension for PHP is enabled and loaded by the PHP engine, PHP applications can take advantage of the functionality without any code modifications.
Posted by Ingenium Web

iNGENIUM Ltd. is an software development company from EU which delivers a full range of custom .NET, web and mobile solutions for different business to meet partner's demand.
The Power of Imagination Makes Us Infinite
Related Posts

Every few years, someone declares WordPress dead. A new platform emerges, trends shift, and commentators predict the end of the content management system that powers over 40% of the web.

WordPress is the backbone of over 40% of websites on the internet, making it the most popular content management system (CMS) globally.

The WordPress segment of the market has been witnessing significant growth, with almost every second website built on this remarkable platform.

Even with little expertise, WordPress can help you create a successful affiliate marketing website.

CMS, also known as Content Management System is a software application that allows users to manage and build websites without coding or constructing them from ground zero.

A website is one of the most significant assets a business can have in this digital era.


Comments
comments powered by Disqus